
imPress Nail Review
By Chan Twin #2
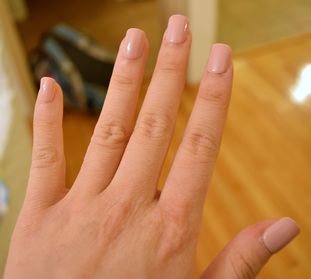
I had to wear some fake nails for a dance performance, and Discount Dance Supply recently sent me a pack of imPress nails. imPress nails come with sticky tape on the back of them and don't require glue for application. Here are my pros and cons.
Pros
- they are waterproof
- they are long lasting
- they looked nice
Cons
- The area of which the sticky tape was on was longer then my nail, and it picked up a lot of crud.
- If I ran my hands through my hair, sometimes the hair got trapped underneath the nail.
- The nails can easily bend and rip a little.
- For the first thirty minutes, I couldn't touch water and had to repeatedly press on them.
- It took a long time to choose which nails fit on each nail.
The imPress nails were pretty to wear, but were a little too much of a hassle for me.
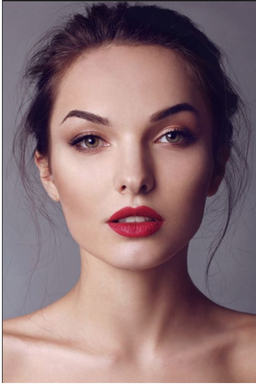
My "When I Wear Makeup" Makeup Look
By Chan Twin #2
|
|
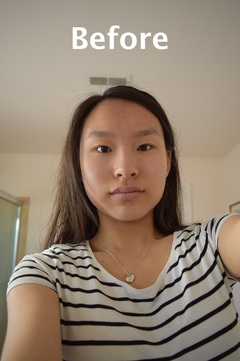
This is my “when I wear makeup” makeup look. I don’t call it a natural makeup look because it’s kinda dark around the eyes but it is definitely not my everyday makeup look because I don’t wear makeup everyday. Chan Twin #1 and I decided to take some photos because of the cherry blossoms, I will show you some photos afterwards. We started using makeup when we were in preschool because of dance performances. Therefore my regular makeup looks a bit dark.
First I used lotion on my face and lip balm to prep my lips.
After that, I filled in my brows.
Then I used this green eyeshadow and concealer to cover my redness and blemishes. I used the green eyeshadow first because the color green counteracts the color red, therefore neutralizing the skin. Then on top I added my concealer. Usually I wear liquid foundation, but today I was lazy.
I took this bone color eyeshadow and put it on my whole lid and my brow bones.
Since we were taking pictures with cherry blossoms, I wanted to add a little pink into my eyeshadow. I took this light pink and added it to the inner corners of my eyes and the inner half of my lower lash line.
Next, I took my blush and put it on my cheeks. (A little tip, before applying the blush on your cheeks, tap out your brush to ensure you have the right amount of blush on your brush.)
Next, I took my black eyeshadow, using a large blending brush, and put it on my "crease." Since I have the asian mono lid, my "crease" is the point my eyeball meets my brow bone. I made sure to blend really well, so it doesn't look like I have two black eyes.
Now on to eyeliner, I took an eyeliner brush and my black eyeshadow, and started to put the black on my lower lash line. After that I smudged it a little bit to make the line not so harsh. I then used my liquid black eyeliner and lined my top lids with a little wing.
With my short stubby eyelashes, I curled them and added lots of coats of mascara.
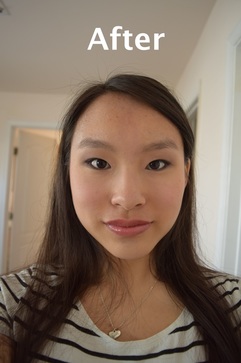
And to sum up my look, I took a rosy red lipstick and added pink lip gloss on top.
And I am done!
First I used lotion on my face and lip balm to prep my lips.
After that, I filled in my brows.
Then I used this green eyeshadow and concealer to cover my redness and blemishes. I used the green eyeshadow first because the color green counteracts the color red, therefore neutralizing the skin. Then on top I added my concealer. Usually I wear liquid foundation, but today I was lazy.
I took this bone color eyeshadow and put it on my whole lid and my brow bones.
Since we were taking pictures with cherry blossoms, I wanted to add a little pink into my eyeshadow. I took this light pink and added it to the inner corners of my eyes and the inner half of my lower lash line.
Next, I took my blush and put it on my cheeks. (A little tip, before applying the blush on your cheeks, tap out your brush to ensure you have the right amount of blush on your brush.)
Next, I took my black eyeshadow, using a large blending brush, and put it on my "crease." Since I have the asian mono lid, my "crease" is the point my eyeball meets my brow bone. I made sure to blend really well, so it doesn't look like I have two black eyes.
Now on to eyeliner, I took an eyeliner brush and my black eyeshadow, and started to put the black on my lower lash line. After that I smudged it a little bit to make the line not so harsh. I then used my liquid black eyeliner and lined my top lids with a little wing.
With my short stubby eyelashes, I curled them and added lots of coats of mascara.
And to sum up my look, I took a rosy red lipstick and added pink lip gloss on top.
And I am done!
Hurray!
By Chan Twin #1
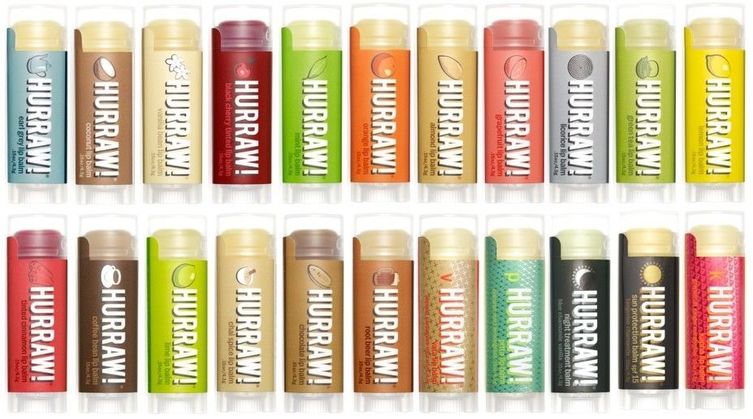
Chan Twin #2 and I have went through multiple brands of lip balms over the years, from Disney princess lip balm (we were four years old) to products form Burt's Bees. We never really liked how these lip balms felt, and most were thick and some of them turned your lips into unnatural colors (Chan Twin #2's Say Yes to Carrots lip balm in pomegranate made her lips turn white, it was disgusting). However, we discovered Hurraw!. Hurraw! is made from “premium, organic, vegan, and raw ingredients.” Our family prefers all natural products over chemical ones. We love how after Hurraw! is applied the coverage is light, while making your lips glossy at the same time.
Hurraw! lip balm is available at Roots and online. Their website is hurrawbalm.com. Twenty-three flavors are available to choose from, ranging from the vanilla to chai spice. Our favorites are green tea and vanilla. On their website the lip balms cost $3.79 except for five specialty flavors. Prices might differ at Roots and other locations.
We really love love this product. Hopefully you will love it too.
NHD Dress Code (as told by Mr. Herdman)
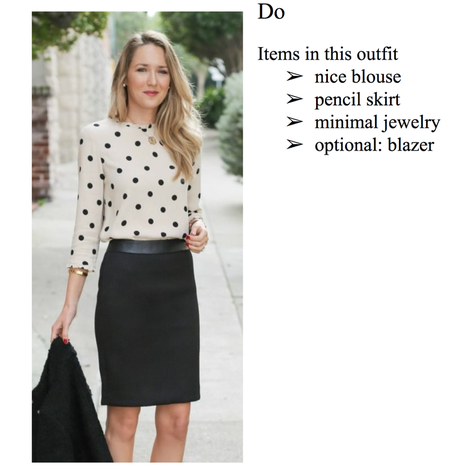
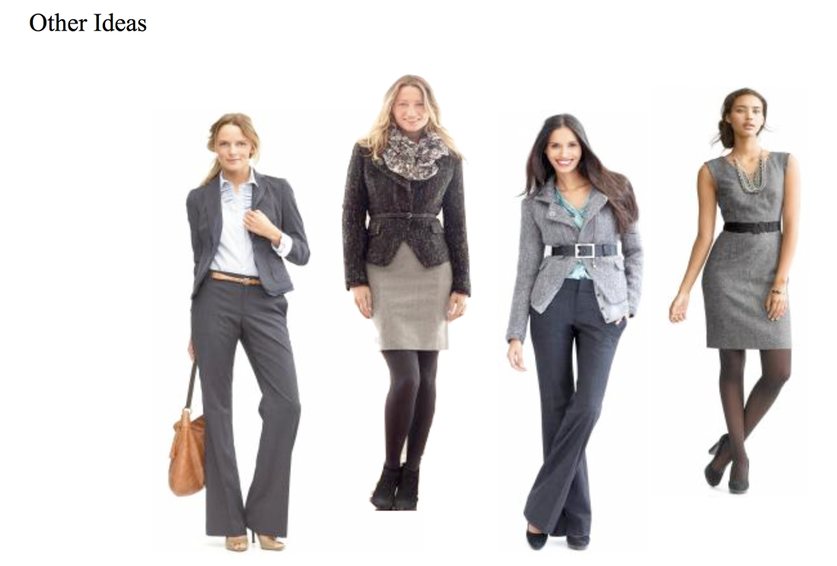
National History Day is on February 12th, which is not that far away! When presenting your project you need to be in business and professional attire. From looking at last year’s attire I think we need to define business wear.
All From Chron.comMenMen generally dress according to job function and company culture. If you are in sales, marketing or law, for example, or if making presentations before audiences is your primary job function, appropriate dress most likely means neutral-colored, conservative business suits, white or light-colored shirts and neck ties. If you work in a trade or technology field, appropriate business attire could mean slacks of your choice, button-down-the-front or polo shirts, or sweaters.
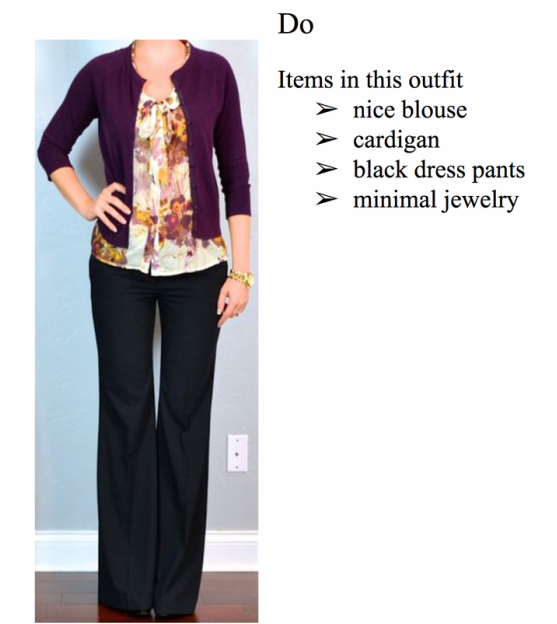
Women
The definition of appropriate business attire for women varies only with the additional requirement to avoid wearing revealing clothing. To this end, to remain compliant with business dress codes, women are often advised not to wear mini-skirts, short-shorts or low-cut tops. Because blouses can be bulky and hot under business suits, you can wear spaghetti-strap or tank tops if you keep your suit jacket on while at work.
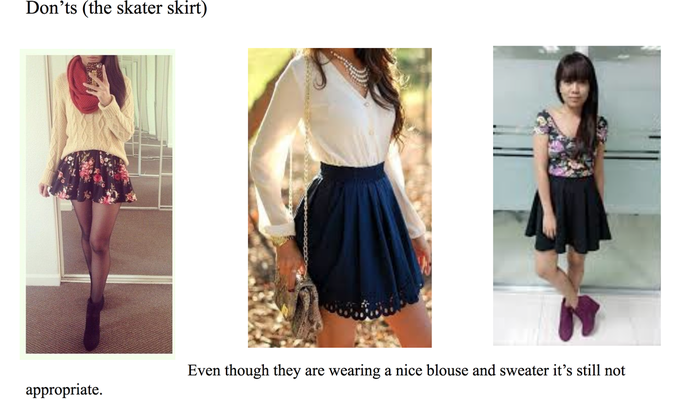
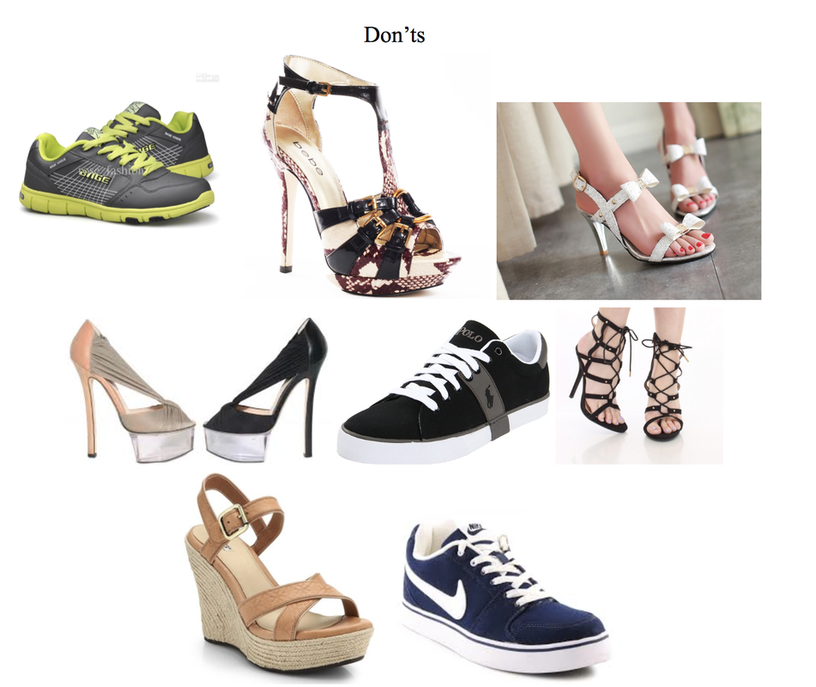
Last year I saw lots of girls wearing the popular trend of crop tops and skater skirts as there “business attire.” Just because you are wearing a skirt doesn’t mean it is appropriate for business wear!The boys did a good job of looking professional except for one thing. Please wear the right shoes with your outfit! Wearing sneakers is not going to cut it!
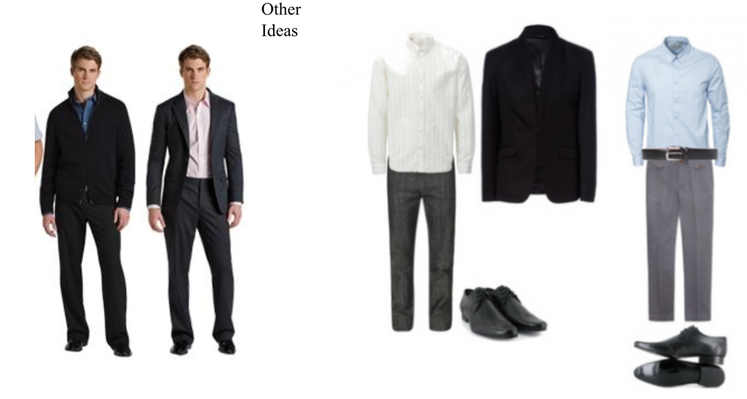
Boys must wear
All From Chron.comMenMen generally dress according to job function and company culture. If you are in sales, marketing or law, for example, or if making presentations before audiences is your primary job function, appropriate dress most likely means neutral-colored, conservative business suits, white or light-colored shirts and neck ties. If you work in a trade or technology field, appropriate business attire could mean slacks of your choice, button-down-the-front or polo shirts, or sweaters.
Women
The definition of appropriate business attire for women varies only with the additional requirement to avoid wearing revealing clothing. To this end, to remain compliant with business dress codes, women are often advised not to wear mini-skirts, short-shorts or low-cut tops. Because blouses can be bulky and hot under business suits, you can wear spaghetti-strap or tank tops if you keep your suit jacket on while at work.
Last year I saw lots of girls wearing the popular trend of crop tops and skater skirts as there “business attire.” Just because you are wearing a skirt doesn’t mean it is appropriate for business wear!The boys did a good job of looking professional except for one thing. Please wear the right shoes with your outfit! Wearing sneakers is not going to cut it!
Boys must wear
- khakis or dress pants
- a long sleeve button down shirt
- dark socks
- dress shoes
- belt
- optional:
- a tie
- suit jacket
- a tie
- dress pants
- skirts
- shortest
- have to hit right about the knee
- have to hit right about the knee
- longest
- ankle length
- ankle length
- no skirts that hit mid thigh
- shortest
- blouse
- high necklines
- conservative
- high necklines
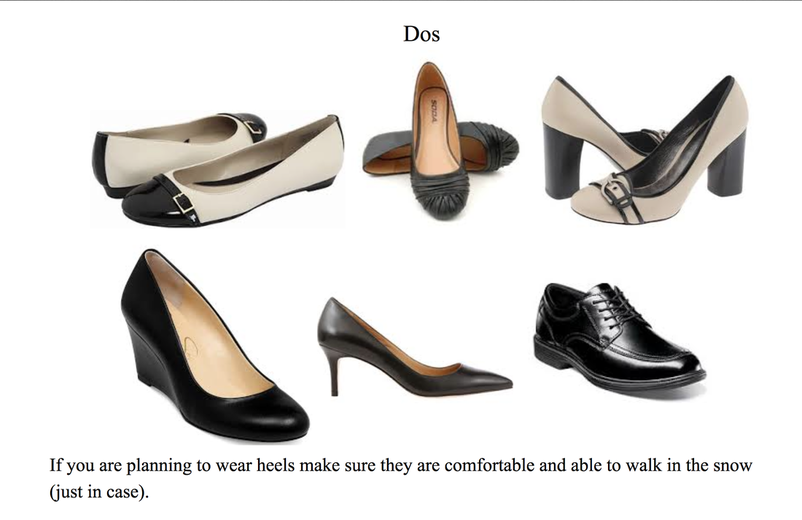
- nice shoes
- flats
- low heels (3 inches or lower)
- neutral color
- flats
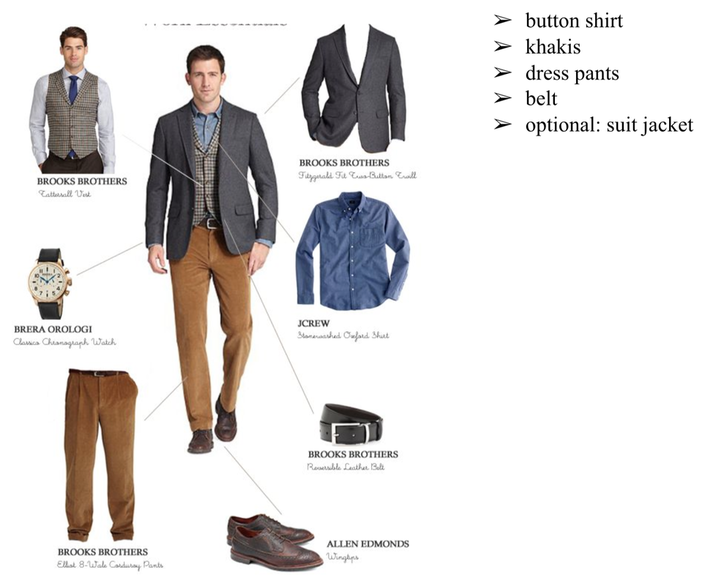
The vest is also optional.
Our "Hair Chop" 2015
By Chan Twin #1
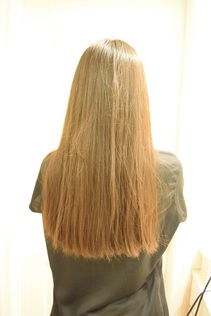
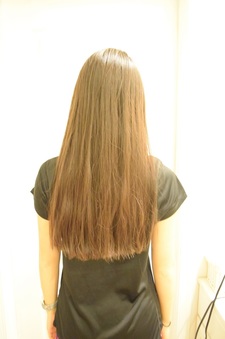
The Chan Twins don’t have their long flowing hair anymore, instead we have mid-length (to us) locks. We cut off around 4 inches of hair. Our hair is still styled the same with no layers. However, Chan Twin #2 is considering getting bangs, just to switch it up a little. Maybe I (Chan Twin #1) should dye my hair or get layers? We’ll see. However, it’s been a while since our hair has been this length for us, so we are open to suggestions to what we should style or to our hair.
This haircut had many firsts. First, our hair is still long. Usually after a haircut it would come just above our shoulders. Second, our mom usually cuts our hair (shoutout to Mom for the awesome haircuts in the past), but this time, we cut each other's hair. Third, this was the first time we had ever cut hair.
Right now we are deciding who is a better hair cutter. Since we are pretty biased, we sent up a poll to determine that.
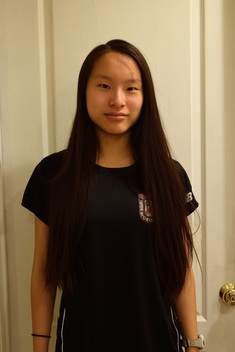
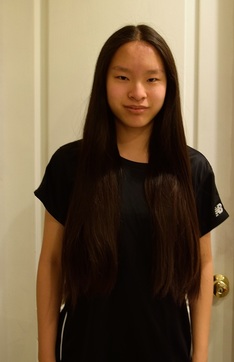
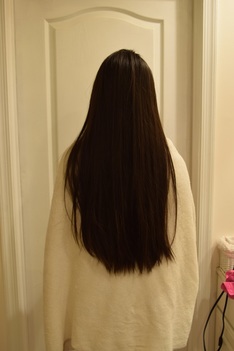
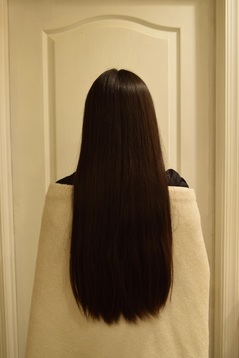

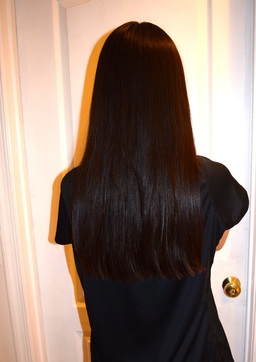
Photo #1 |
Photo #2 |
|
|
Makeup Look For the Holidays
By Chan Twin #2
The Bold Red Lip
The bold red lip look has dramatic brows and eyelashes. This look is a classic and very simple to do.
The bold red lip look has dramatic brows and eyelashes. This look is a classic and very simple to do.
- First prime your face, and do your regular foundation/concealer/eye priming routine if you have one.
- Sweep a natural eyeshadow color (tan, gold, and nude) on the center of your eyelid, and under your eye.
- Add a darker natural color (brown/dark gold) on your crease/want to be crease, ( I understand your pain) and the outer corner of your bottom lashes. And blend away.
- Add a white eyeshadow on your browbone and the inner corners of your eyes.
- This step is optional, take an eyeliner pencil or a dark eyeshadow on an angled brush and line your bottom lash line.
- Add a eyeliner using an eyeliner pencil and smudge it.
- Add a sweep of liquid eyeliner, winging it if you want.
- Curl your lashes and apply mascara.
- Add a sweep of blush on the apples of your cheeks. This can be any type of blush you have.
- This step is also optional, contour your cheeks using a bronzer.
- Fill in your brows if needed.
- Add a red lipstick to your lips. You could line your lips before hand. but we really don’t.
Natural Makeup Look
By Chan Twin #1
One of my favorite makeup tutorial is demonstrated by Erin Bates. She does a natural look that brightens up her facial features. I like how it is so easy, but the effects are noticeable.
I done this look before and really like how it turned out. All you need is gold/tan, white, and brown eyeshadow, eyeliner (doesn’t need to be liquid liner), mascara, concealer/primer (I didn’t use any and it turned out fine), and your choice of face makeup (foundation, lipstick, bronzer etc.)
I done this look before and really like how it turned out. All you need is gold/tan, white, and brown eyeshadow, eyeliner (doesn’t need to be liquid liner), mascara, concealer/primer (I didn’t use any and it turned out fine), and your choice of face makeup (foundation, lipstick, bronzer etc.)
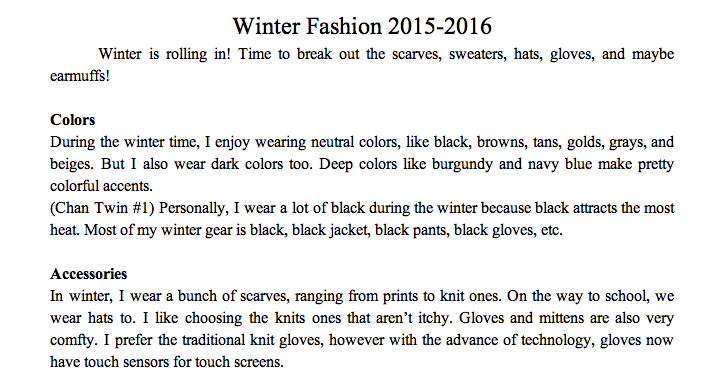

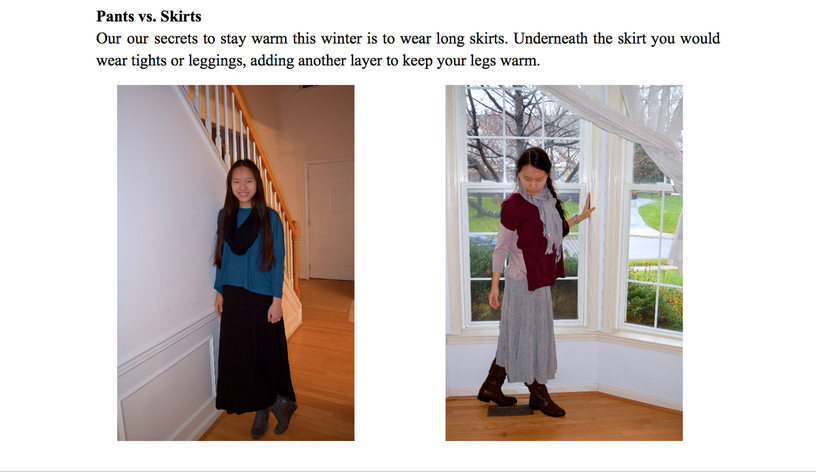
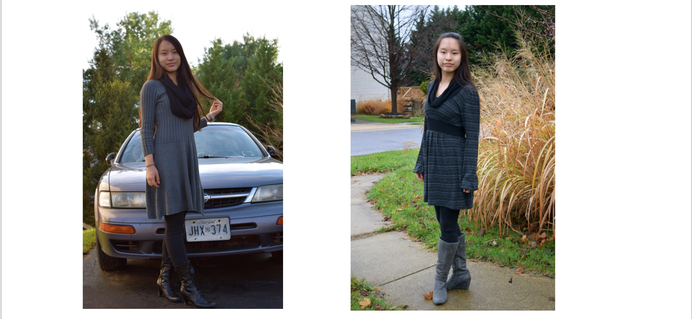
OUR FAVORITE WINTER STAPLE, SWEATER DRESSES!
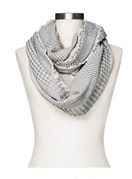
A must have in our closet, SCARVES!!!!!!!!
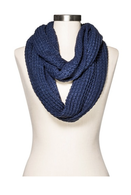
http://www.target.com/p/women-s-knit-infinity-scarf/-/A-48326311#prodSlot=large_1_7
(multiple colors)
(multiple colors)
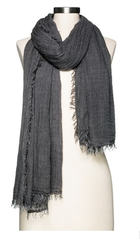
http://www.target.com/p/women-s-scarf-aqua-mossimo-supply-co/-/A-23937649#prodSlot=large_2_9
(multiple colors)
(multiple colors)
HATS
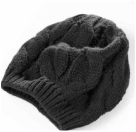
http://www.kohls.com/product/prd-2246699/simply-vera-vera-wang-mixed-stitch-cable-knit-beanie-women.jsp?color=Black
(multiple colors)
(multiple colors)
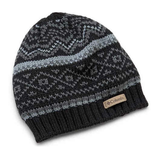
http://www.kohls.com/product/prd-2392072/womens-columbia-white-pine-beanie.jsp?color=Black%20Alpine
(multiple colors)
(multiple colors)
BOOTS!
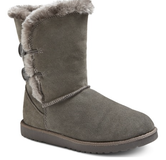
http://www.target.com/p/women-s-kamar-shearling-style-boots-mossimo-supply-co/-/A-18816341
(multiple colors)
(multiple colors)
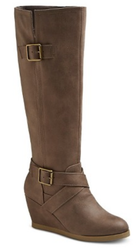
http://www.target.com/p/women-s-avis-fashion-boots/-/A-18819404#prodSlot=_1_1
(also comes in black) This boot is very similar to Chan Twin #1’s gray heeled boots.
(also comes in black) This boot is very similar to Chan Twin #1’s gray heeled boots.
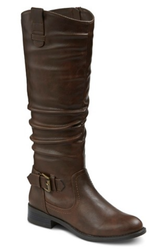
http://www.target.com/p/women-s-quinn-fashion-boots/-/A-50361882#prodSlot=_1_6
(also comes in black and gray) Chan Twin #2 has this boot in Cognac, it looks better in person.
(also comes in black and gray) Chan Twin #2 has this boot in Cognac, it looks better in person.
WINTER AND HOLIDAY OUTFITS 2015-2016

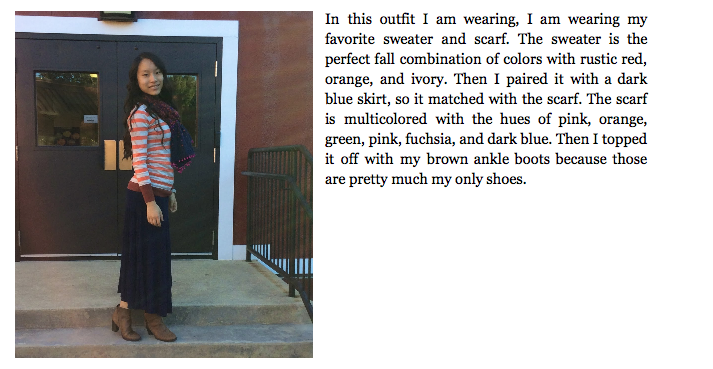
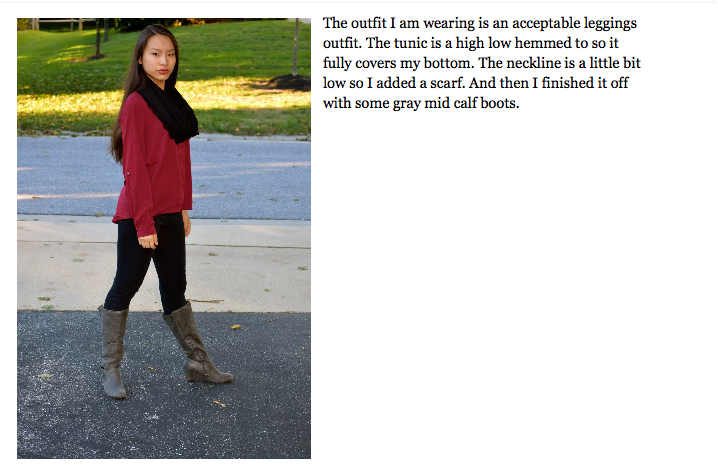
The Cozy
Sweater: https://www.francescas.com/product/waller-solid-textured-tee.do?sortby=ourPicks&refType=&from=fn
The sweater is a high low hem, deeming it appropriate to wear with leggings.
Leggings:
http://www.kohls.com/product/prd-2204184/so-juniors-sweater-knit-leggings.jsp?color=Black%20Print
Boots:
http://www.target.com/p/women-s-kalliope-shearling-style-boots-mossimo-supply-co/-/A-1735376
Scarf:
http://www.aeropostale.com/basketweave-infinity-scarf
/product.jsp?productId=80111896&cp=3534618.3534619.3534623.3541050.3536159.2144312
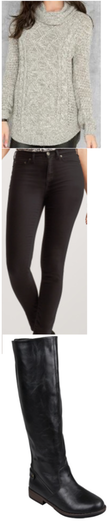
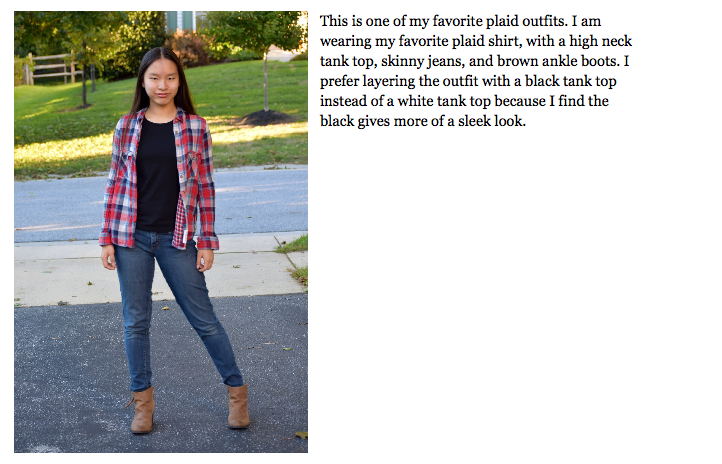
The Simple
Sweater:
https://www.francescas.com/product/waller-solid-textured-tee.do?sortby=ourPicks&refType=&from=fn
Jeans:
http://www.aeropostale.com/seriously-stretchy-color-wash-high-waisted-jegging/product.jsp?productId=58697556&cp=3534618.3534619.3534623.3541050.3536152.4330109.4401830
Boots:
http://www.target.com/p/women-s-kalliope-shearling-style-boots-mossimo-supply-co/-/A-1735376
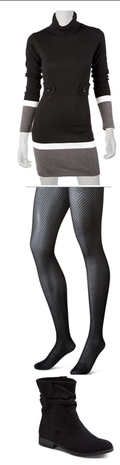
The Dressy
Sweater Dress:
http://www.kohls.com/product/prd-2373966/iz-byer-california-juniors-colorblock-sweaterdress.jsp?color=Black
Tights:
http://www.target.com/p/women-s-premium-tights-classic-patterns-merona/-/A-15646205#prodSlot=large_1_101
Boots:
http://www.target.com/p/women-s-alice-scrunch-booties-merona/-/A-18819020
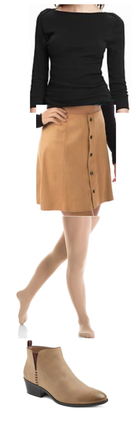
The Suede
Top:
http://oldnavy.gap.com/browse/product.
do?cid=1036302&vid=1&pid=686591012
Skirt:
http://www.target.com/p/fashion-union-women-s-button-front-suede-skirt/-/A-50323852
Tights:
http://www.mondor.com/footed-durable-tight-6898.html
These tights are figure skating tights. We find from experience that wearing figure skating tights are much warmer than wearing regular tights.
Boots:
http://www.target.com/p/women-s-sam-libby-peyton-booties/-/A-17369791

Holiday Special Occasion
Dress:
https://www.francescas.com/product/lisette-lace-dress.do?sortby=ourPicks&refType=&from=fn
Heels:
http://www.target.com/p/women-s-tevolio-hadia-bow-wedges/-/A-16908440#prodSlot=_1_49
Embrace the bow!
Necklace:
http://www.icing.com/us/products/marlowe-hematite-geometric-crystals-statement-
necklace-79605
Earrings:
http://www.icing.com/us/products/marlowe-hematite-geometric-crystals-drop-earrings-79691
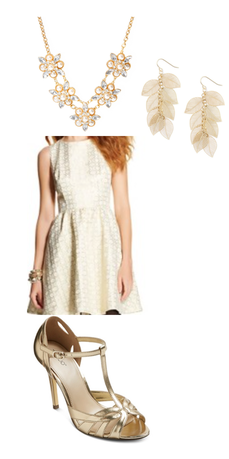
New Years
Dress:
http://www.target.com/p/sleeveless-fit-and-flare-dress-cream-xhilaration/-/A-39599691#prodSlot=_1_23
Heels:
http://www.target.com/p/women-s-tevolio-eleri-heeled-sandals/-/A-17129141
Necklace:
http://www.icing.com/us/products/avery-pearl-and-crystal-flowers-statement-necklace-65917
Earrings:
http://www.icing.com/us/products/gold-falling-filigree-leaves-drop-earrings-13074
Holiday Hairstyles
The Triple Flip
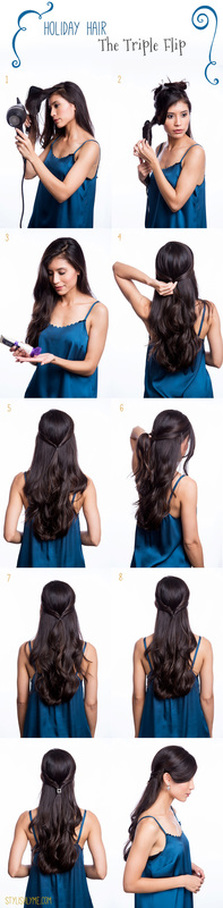
(All rights belong to tips.utola.com)
http://tips.utola.com/?p=1454
You’ll need:
Step 2: {*Optional} Starting from the bottom section of your hair, using a large barrel curling iron, curl your hair. Remember to curl outward.
Step 3: After curling add a finishing cream or lightly hairspray the curls.
Step 4: Take a small section of your hair from the front, near your temples. You don’t want to pull all your hair back just the two small sections. Tie it with a small elastic band.
Step 5: Once you have it tied you’re going to flip the small tail inwards. So flip it up and pull it through, just like a topsy tail.
Step 6: Again grab another small section of hair on either side right underneath the last two sections.
Step 7: Tie and flip.
Step 8: Repeat until you have three small topsy ponytails each on top of the other to create the triple flip. Add a small hair clip to cover up the elastic band. Pull your bangs back and tuck them behind your ear or pin down with a pretty bobby pin.
http://tips.utola.com/?p=1454
You’ll need:
- Small Elastic Bands
- Pretty Hair Clip
- Hairspray
Step 2: {*Optional} Starting from the bottom section of your hair, using a large barrel curling iron, curl your hair. Remember to curl outward.
Step 3: After curling add a finishing cream or lightly hairspray the curls.
Step 4: Take a small section of your hair from the front, near your temples. You don’t want to pull all your hair back just the two small sections. Tie it with a small elastic band.
Step 5: Once you have it tied you’re going to flip the small tail inwards. So flip it up and pull it through, just like a topsy tail.
Step 6: Again grab another small section of hair on either side right underneath the last two sections.
Step 7: Tie and flip.
Step 8: Repeat until you have three small topsy ponytails each on top of the other to create the triple flip. Add a small hair clip to cover up the elastic band. Pull your bangs back and tuck them behind your ear or pin down with a pretty bobby pin.
Princess Aurora Twistback | Inspired by Disney’s Maleficent
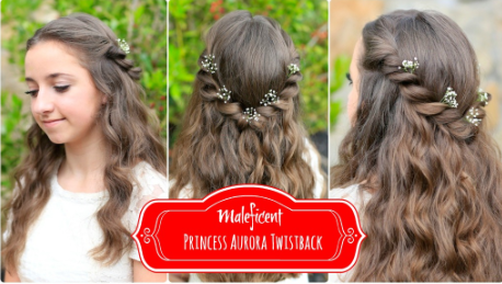
(All rights go to Cutegirlshairstyles. Visit them at cutegirlshairstyles.com)
This hairstyle can be done on curly or straight hair. I love how this is a simple style, but gives a beautiful look and feel.
#CGHAuroraTwistback
Items Needed: Brush, rat-tail comb, spray bottle, 1 small hair elastic, hairspray {if desired}.
Time Requirement: 4-6 minutes
Skill Level: Easy
Step-by-Step Instructions:
- {Optional Step} Use a medium-sized wand to add soft waves as a base to this hairstyle. If you prefer to to use no heat, use two simple braids the night before.
- Begin this hairstyle by parting the hair down the middle of the head…
- Next, section off a strand of hair about 1 inch above the ear, and about 3-4 inches back from front of the head…
- Divide this strand into two equal, but smaller sections…
- Begin a simple twist using this hair {you want the hair to go in a diagonal direction behind the ear and towards the back of the head} and don’t twist the hair too tight {you want this to be soft looking}…
- When you are done twisting it, clip it out of the way, repeat on the other side…
- Complete Steps #3-6 on the other side of the head…
- When you have both twists completed, secure them in the middle of the back of head with an elastic…
- For the next step, you will need to loosen up the twists…
- Do this by gently tugging on every other twist elbow so that the section pancakes out a little…
- Repeat on as many bumps as you would like, on both twists, so that they look very loose and almost “messy”…
- Now, to hide the rubber band, take a small strand of hair from the remaining hair behind the elastic, loop it upward over the elastic and down behind the twists…
- Using the same strand of hair, take it around the front of the elastic again and then back behind, and secure with a small bobby pin…
- Add hairspray and flowers {if desired}.
Braid Flip Combo Hairstyle
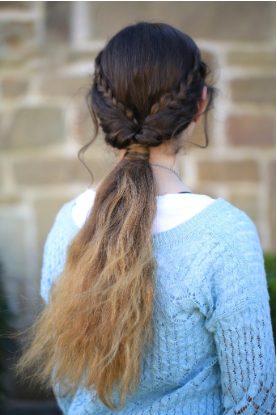
(All rights go to Cutegirlshairstyles. Visit them at cutegirlshairstyles.com)
The Braid Flip Combo is perfect on straight hair, waves, or curly hair, and would be perfect for any occasion. You can dress it up or down, depending on where you are going.
#CGHBraidFlipCombo
Items Needed: Brush, rat-tail comb, spray bottle, 1 small hair elastic, w ponytail holder, 1 small bobby pin, and hairspray {if desired}.
Time Requirement: 3-5 minutes
Skill Level: Easy
Step-by-Step Instructions:
- Begin with hair down, and pick up a section near the temple on the side of the head and create a regular three strand braid…
- Create another 3-strand braid on the other side of the head, and secure the two braids together with a hair elastic into a tieback in the back center of the head {flip this braided section over onto the top of the head temporarily, so that it is out of the way}…
- Pull all remaining hair to the back of the head and secure into a loose a ponytail with a ponytail holder {feel free to leave a few strand of hair out to frame the face to soften the look}…
- Now, create a hole in the middle of the ponytail, just above the rubber band, and flip the ponytail down through it… creating a flip in the hair.
- Now lower the braid back down and tuck it through the ponytail flip as well, making it look like the braids were flipped at the same time…
- At this point, tug, pull, and loosen the hair a little that goes into the flip {to help it look more full and mature looking}…
- Feel free to add a ribbon or bow to hide the elastic, or use a strand of hair from the ponytail to wrap the elastic and secure with a bobby pin.
- Add hairspray {if desired}
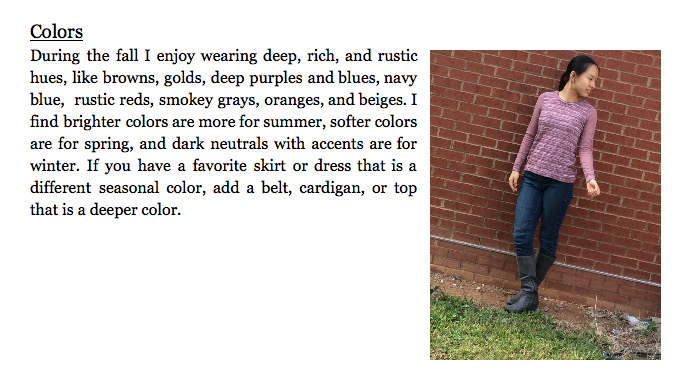

Spring Style 2015
By: Karina Patel
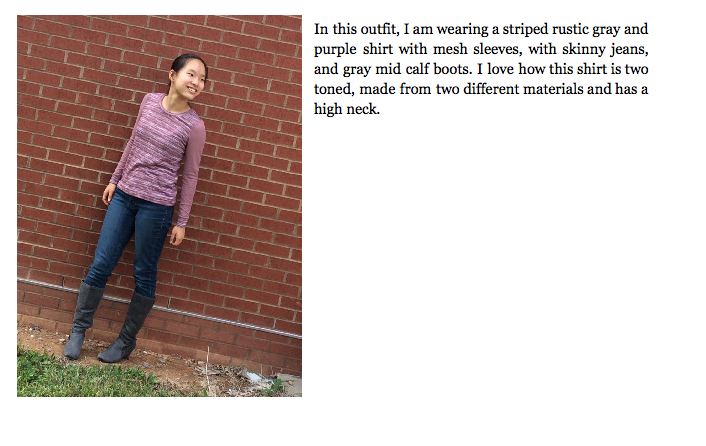
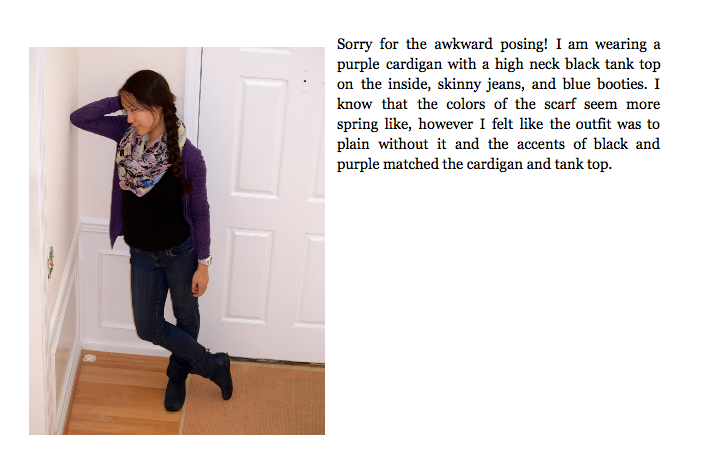
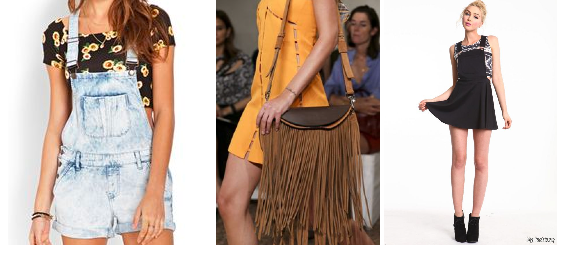
Do you need a new look for this Spring? You’ve come to the right spot! This year you won’t have to do as much spring cleaning because most of last year’s styles are back! Things like rompers, overalls, and black and white pieces are all over the place. Some new things in style this year are fringe and over-sized cardigans. Fringe on anything is basically the style so boots, purses, tops, and scarves would work. A spring staple piece is a printed over-sized cardigan or kimono, floral print is the most popular but they come in stripes and tribal prints too.
So now that you know the trends, here are some ways to wear the different styles. You can totally wear rompers just as they are but you can always layer denim vests or cardigans overtop. Whenever somebody hears the word “overalls” they think of farm girls. However, they are slowly making a comeback this spring, wear them with crop tops or printed tees. If black-and-white is too basic for you, then try adding a pop of color like royal blue, coral, or pastel pink. You can style fringe in any way possible, any t-shirt or dress can make fringe stand out, so styling it won’t be hard. Over-sized cardigans or “duster cardigans” are the perfect lightweight accent and add a touch of style to any outfit. Throw one on over a graphic tee, dress, or even a romper!
Even if you’re not the most fashionable person, at the end of the day the key to style is being yourself. “You’re never fully dressed without a smile!”
Mermaid Half Braid (For long hair)
|
(All rights belong to Cutegirlshairstyles. Visit the at cutegirlshairstyles.com)
This hairstyle is a mermaid braid which is typically a french braid but when adding hair, you add teeny tiny sections. This hairstyle can be wore with curly hair, but I recommend straight hair. It is not recommended to do this hairstyle for active purposes. Items Needed: Brush, rat-tail comb, spray bottle, 1 small hair elastic, hairspray and accessory {if desired}. Step-by-Step Instructions:
|
|
Valentine Hairdos
by Phoebe Chan
With Valentine’s Day coming up you need a cute special hairstyle for the holiday. Here I have a two cute hairstyles that you can wear for the special occasion. These hairstyles, instructions, and videos were created by cutegirlhairstyles.
The first hairstyle, the Love Bun. This hairstyle is created by using a bun maker. It is simple and easy because if you know how to create a donut bun then you can do this hairstyle.
Items Needed: Brush, rat-tail comb, spray bottle, 1 bun maker {hair donut}, 4 small hair elastics, 2-3 hair bands, 6-8 bobby pins, hairspray and accessory {if desired}.
Time Requirement: 5-8 minutes
Skill Level: Medium
Step-by-Step Instructions:
1. Begin by modifying your bun maker…
2.. Take a standard bun maker, and pinch the bottom of it together until it creates a point, and then place two hair elastics over it to keep the bottom squished together holding that shape…
3. Now pinch together the top left side of the bun maker and slide two more hair elastics of it, and do the same on the right side {this will create the “M”-shaped divot at the top of the heart, now leaving you with a more triangular-shaped bun maker instead of a donut}….
4. Next, create a ponytail on the back of the head and secure it with a hairband…
5. Now take the modified bun maker, and slide it onto the ponytail holder and against the base of the head…
6. Then, tip your head down and let the hair fall evenly over the bun maker…
7. Once you have the hair evenly spaced, take a hair band {you may need to use two hair bands} and slide it over the bun {it should cinch down enough to hide the bun maker completely with hair, pulling the hair tight against the bun maker and forming a heart-shaped bun}…
8. You should still have remaining hair ends sticking out from the bun, so pick up a small section and begin twisting the hair, adding in more hair as you go. Continue twisting in hair until you have included all the hair around the base of the bun, and secure with a few bobby pins {you can also use the to create a braid-wrap accent, if you want}
9. To help emphasize the heart shape, gently pull down on the middle hair of the “M” of the heart and secure it with a bobby pin…
10. Next, gently tug on the arches of the heart to make them more full, which will also add more definition of the heart.
11. Add hairspray or accessory {if desired}.
The second hairstyle, the Mermaid Braid, is a unique half up half down hairstyle with hearts woven into the knots.
Items Needed: Brush, rat-tail comb, spray bottle, 6 small hair elastics, pomade, accessory {if desired}.
Time Requirement: 5-8 minutes
Skill Level: Medium
Step-by-Step Instructions:
1. Begin with wet or dry hair {I find that for the first try, the hair lays better if done wet}…
2. Then pick up a section of hair right behind each temple. Pull them to the back center of the head, apply a little bit of pomade, and then secure with an elastic…
3. Pick up another small section of hair directly underneath the first ones, pulling them to the back of the head, and applying pomade, just as you did before…
4. On your first side, place your pointer and middle fingers onto of the section you just pulled back…
5. Then tuck your fingers underneath the first section you pulled back….
6. Now, place the second strand between those fingers and gently pull the strand downward {this should create a looping effect around the first strand of hair}…
7. Repeat Steps #4-6 on the other side…
8. Next, grab the ends of the two second strand and secure them together to form the heart shape {make sure you like the shape of the heart before you move on}…
9. Continue with Steps #4-8 for both sides until you have three total hearts…
Optional: I ended the style with three hearts and curled the rest with my wand, you could also add a simple braid, a fishtail, or continue the hearts down the remaining hair into a full Mermaid Braid.
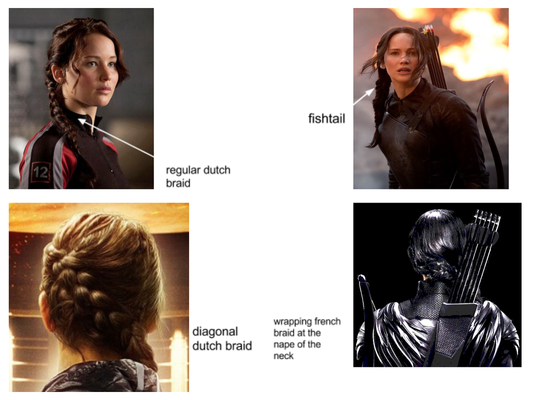
Katniss’s Mockingjay Braid
By Phoebe Chan
Everyone knows Katniss’s iconic braid in the Hunger Games and Catching Fire, but in Mockingjay Katniss is now sporting a different hairstyle. Instead of the regular dutch braid that starts from the left and rest on the right shoulder it is two wrapping french braids starting on both sides of the head that combines together on the right shoulder in a reverse fishtail. You can learn how to recreate the new style with the video from Cute Girls Hairstyles.
Fall Style 2014
By Karina Patel
Girls, are you rushing to get ready every morning? Can’t find an outfit that’s cute but still comfy? Well here are some tips on getting ready in a rush this Fall and Winter! One of the latest trends this Fall season is incorporating military clothing into cute outfits. Things like combat boots and army green twill jackets are Fall staple pieces and will compliment any outfit this season.
Another trend this fall season is slim crop tops with high rise skater skirts. This is the perfect year-round outfit but you might be thinking; isn't it too cold? Don't worry! You can still wear this cute outfit in the colder seasons just by adding a pair of knit tights and a jacket. Your fave outfit--just...warmer! Another way to make this outfit better for the colder months is to use deeper colors like burgundy, navy, gray, gold, royal blue, and purple. You can also wear your favorite dresses this season just by layering sweaters or cardigans over them!
Now we all have those days when we’re in a rush to get ready so here are some tips! If you want to be comfy but still want to be somewhat presentable, jean leggings are the way to go. They look like jeans but are stretchy and soft like leggings, just don’t get them confused with jeggings. Just throw on a sweater and some boots and you’re good to go! Printed leggings are also very trendy, and comfy for the colder seasons. You can dress them up with a nice top or dress them down with an over-sized sweater, either way these printed bottoms are super cute!
Boys, don’t worry, there are tips for you too! Basketball shorts and t-shirts may be comfortable, but why not try a different look once in a while? Joggers are in and can be a substitute for your basketball shorts during the cold weather. Khaki pants are also trendy and can be worn with button-down shirts and polos. Have a favorite graphic tee but its too cold to wear it? Just by adding a flannel shirt not only will you be warmer but the plaid pattern brings the t-shirt to the next level.
As you can tell, there are plenty of options out there for this season. Step out of your comfort zone and try a new look, you might surprise yourself! Style on, my friends.
